
Buying guide · Brother 1034D
Serger for Beginners: Your First Day, Step by Step
New serger and not sure where to start? Follow this calm first-day plan for a Brother 1034D: oil it, thread it, then test it before you sew.
Disclosure: we may earn a commission if you buy through links on this page, at no extra cost to you. As an Amazon Associate we earn from qualifying purchases. It never changes what we recommend.
Disclosure: we may earn a commission if you buy through links on this page, at no extra cost to you.
How do you start with a new serger? Three steps: oil it, thread it, test it. Do them in that order, on your first day, and you will know quickly if the machine is a keeper.
If a serger just landed in your house and the box is still taped shut, this page is for you. You are not the first. A woman on r/sewing wrote that her husband got her a serger for her birthday: “I was so excited I cried. I can’t wait to learn how to use it. But I’m feeling overwhelmed and don’t know where to start.” The post collected 2,866 upvotes, so many people feel the same way. Another sewist wrote that they hadn’t even taken theirs out of the box “due to…nerves?”
We build this serger for beginners plan around the Brother 1034D, because that is the machine our research covers. We only include steps that owners or Brother’s own materials support. Where we do not know something, we say so.
Key takeaways
- Oil the machine first, following the manual.
- Use serger cones, and follow the color-coded guides one thread at a time.
- Leave an hour for your first threading and do not rush it.
- Test on scrap fabric inside the return window and watch for the timing problem.
- A wheel that will not turn or loopers that hit each other mean a return, not a hobby problem.
What should you check when you unbox a serger?
Open the box and lay everything out. According to Brother, the 1034D comes with four thread cones, a soft cover, a pouch of needles, four thread nets and four cone caps, tweezers, a brush, a hex wrench, a trim catcher, a foot pedal, and a manual in English and Spanish. It also comes with three feet: standard, blind stitch and gathering.
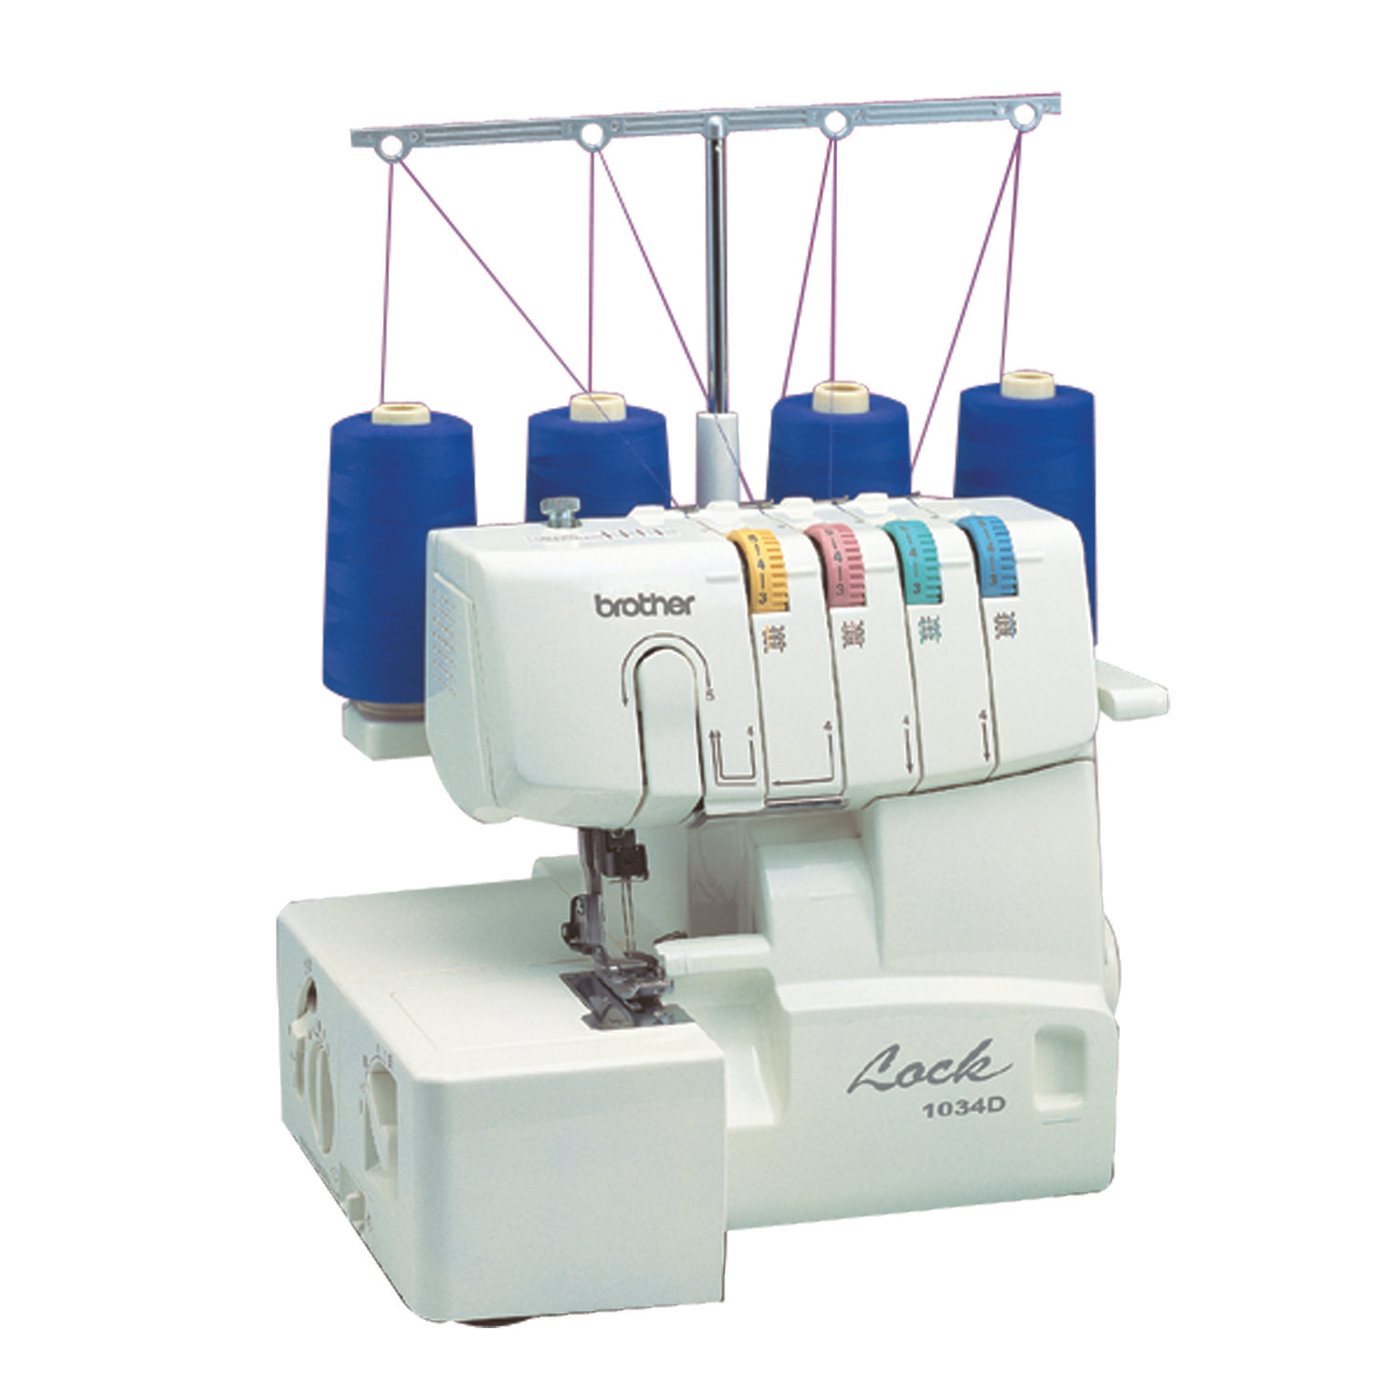
Two practical points. First, if the machine looks used or damaged, stop and deal with the seller. Seven of the 43 critical reviews that mention a machine stopping or being defective say it arrived broken or used. Second, find the manual and keep it next to the machine. Thirty-four of the 100 critical reviews we read complain about the manual or its instructions, so you may want to pair it with videos. One sewist chose the 1034D because “everyone has” it, which means help on YouTube is easy to find.
Still on the fence about the machine itself? Read our Brother 1034D review first. This page assumes it is already on your table. The short version is on our Brother 1034D serger page.
Step 1: How do you oil a new serger?
Owners are direct about this. One 5-star reviewer’s advice: “You must oil before the first use.” Oiling comes up in 4 of the 100 critical reviews as well.
How to do it is in the manual in your box, so follow that. We are not going to list oil points or the type of oil here, because we have not verified them. A wrong detail on a moving part is worse than no detail. Put the oil step first, before any thread goes near the machine. It is the cheapest thing you can do for the machine, and many first-time owners skip it.
Step 2: How do you thread a serger?
Use serger cones. The machine takes cones of serger thread, not ordinary spools from a sewing machine. Four cones are in the box. Skipping this is one of the ways owners say you get tension trouble and thread breaks.
Follow the color. The 1034D has lay-in threading with color-coded guides and a threader for the lower looper. Each thread follows its own colored path. Work on one thread at a time, in the order the diagram shows. A 5-star reviewer wrote: “The colour-coded threads were amazing to show how they actually interlock.”
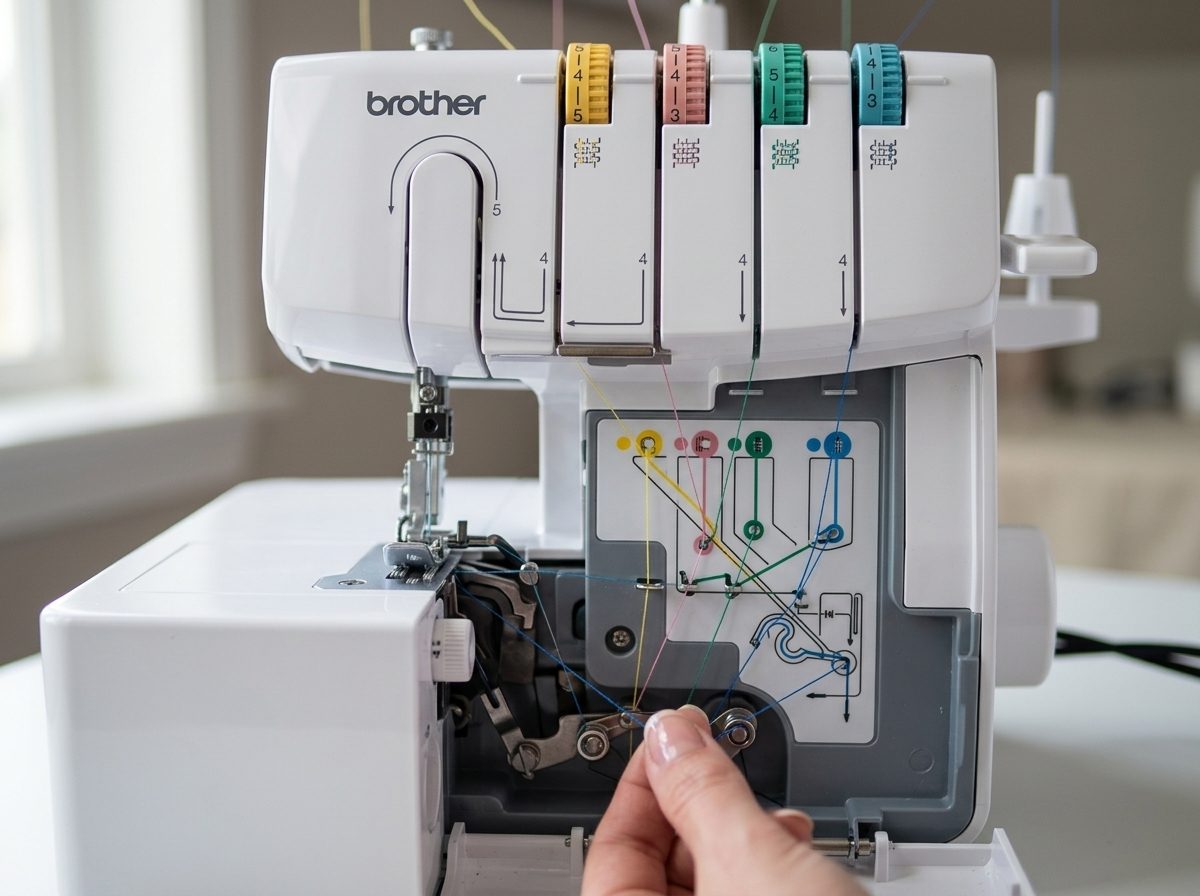
Expect minutes, not seconds. Threading takes minutes once you follow the diagram, but the first time is intimidating. 36 of the 100 critical reviews mention threading, including a 3-star reviewer who called putting the thread back through “a time consuming mess.” A Reddit commenter wrote: “There’s no need to be intimidated by threading a serger. It’s really not that difficult.” Both are fair. Leave an hour for your first threading.
Check whether it is already threaded. One reviewer said that theirs “comes pre-threaded so you can tie new thread right on the old one and thread easily!” If yours arrives threaded, that trick may save you the first time. We have not confirmed this on a new box, so look at it before you cut anything.
Looking for a tutorial? We could not confirm an official Brother tutorial link in our research, so we are not sending you to one. Search for the 1034D by model number. Owners say the video support is large.
Step 3: How do you test a new serger?
This step matters most, and people skip it because they are excited. Do it while you are still inside the return window. Check the window with the seller on the day the machine arrives, and put the date on your calendar.
Sew scrap fabric first. Not your real project. Scrap lets you see what the machine does without risk.
Look for the problems the critical reviews describe:
- The handwheel will not turn. One 3-star reviewer wrote: “The wheel would not turn because the upper and lower looper would hit each other, known as a timing problem.” If the wheel binds, stop.
- Loopers that hit each other or stitches that skip. This is the same timing problem. 19 of the 100 critical reviews mention it, and 4 of those are from 2024 to 2026. Another reviewer wrote that theirs “needed to be serviced straight out of the box to get it running correctly.”
- Thread that keeps breaking or tangling. This is the most common complaint, in 44 of the 100 critical reviews. Re-check your threading and your oil step first.
- A machine that jams quickly. One reviewer wrote: “Seized up after an hour of use.”
If the machine fails a test, do not try to fix a possible defect yourself. Use the return window. That is why we say to test early.
Planning a rolled hem? Test the tension. One 3-star reviewer said the rolled hem settings suggested in the manual “do not work well.” Treat the manual’s numbers as a starting point and check them on scrap.
What will the 1034D not do on day one?
The 1034D does not make a coverstitch, the double-row hem on a store-bought T-shirt. Check that this is not what you were hoping for. Our guide, Serger vs coverstitch: which one you need, explains the difference. According to Brother’s spec sheet, it also has no screen, no electronic speed control and manual tension.
When should you stop and ask for help?
If you cannot thread it after a patient hour, ask. r/sewing has many threads where people say they felt overwhelmed in the same way, and owners answer. If something mechanical goes wrong in the first days, such as the wheel not turning or the loopers hitting, that is a return, not a hobby problem.
What comes after day one?
We do not have a verified list of beginner projects, so we are not going to invent one. What we can say is that a happy reviewer who rarely sewed wrote: “I always wanted a serger but I thought it was too extravagant since I don’t sew a lot […] I do think I will sew many more things now.” If the machine passes its three tests, you are in a good position to find out whether that happens to you.
The first-day plan in one list
- Unbox, check the contents and keep the manual close.
- Oil it, following the manual.
- Thread it with serger cones, following the color guides, one thread at a time.
- Test it on scrap, inside the return window, and watch for the timing problem.
Still deciding? Our Brother 1034D serger page puts the pros, the limits and the owner reviews in one place.
Frequently asked questions
Is a serger hard to thread?
It takes practice, but it is not a mystery. On the 1034D, the lay-in path has color-coded guides and the lower looper has its own threader. Leave an hour for the first time and work one thread at a time.
Do I need to oil a new serger?
Owners say yes. One 5-star reviewer wrote: “You must oil before the first use.” Follow the oiling steps in your manual.
What thread does a serger use?
Serger cones, not ordinary spools from a sewing machine. Four cones come in the box with the 1034D.
What should I sew first on a new serger?
Scrap fabric. It lets you test the machine and see problems without risking a real project, and you can do it inside the return window.
What if my new serger will not run right?
If the wheel will not turn, the loopers hit each other or the machine jams, stop and use the return window. Do not try to fix a possible defect yourself.
Last checked: 2026-10-27. Specifications and availability checked against the manufacturer and retailer pages on this date. Prices change often, so the retailer page always wins.